Table of Contents
A screw gauge tool is indeed the best tool for measuring spherical or cylindrical objects precisely. Untrained hands may find it difficult to use an extremely fine-tuned screw gauge.

Screw Gauge Measurement Using the Micrometer
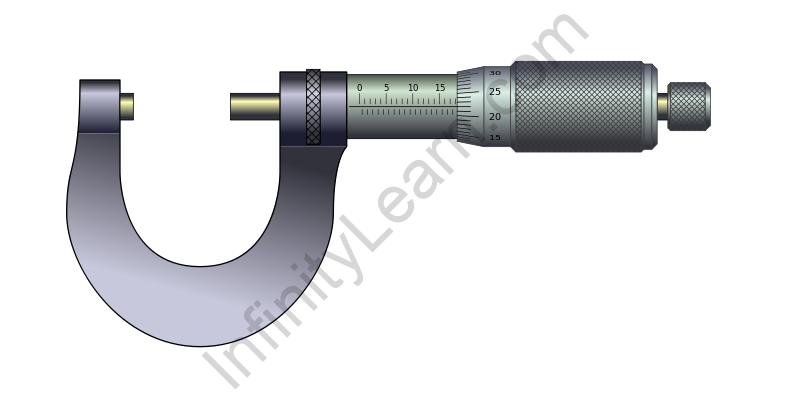
- Learn about the construction of a Screw Gauge: A few sections, such as the Sleeve, Anvil, Spindle, Thimble Lock, Frame, Thimble, and Ratchet Stop, are movable, while others are fixed.
- Prior to actually beginning to measure, clean the spindle and anvil as follows: Place a piece of paper or a clean cloth between the spindle and the anvil. Stiffen the setup slightly until the paper or cloth becomes jammed, then pull it out while cleaning the setup. One such step is optional, but it aids in obtaining an accurate measurement because precision is essential.
- Insert the object between the spindle and the anvil: Carefully place the object between the anvil and the spindle. Because the anvil is stationary in nature, place the object on it. The entity must be properly placed so that it does not move while being measured.
- To tighten, rotate the ratchet counterclockwise: Make sure that the thimbles zero are parallel to the line of the scale on the sleeve.
- Stiffen the spindle while holding the object in place: When rotated, the thimble clicks. Apply enough force until it clicks three times.
- While the object is in between, secure the thimble: Even if the thimble is locked, the spindle can be moved. It then assists you in obtaining an accurate measurement.
- Remove the object with caution: The accuracy of the screw gauge can be compromised if it is scratched or shaken, so avoid doing so.
- Note down the reading before you unlock the spindle: If the single setup becomes loose, re-measure the entire setup.
Screw Gauge Measurement through the Inch Micrometer
- The thimble comes in a variety of scales: The scale seems to be one hundred thousand, that is the one-tenth of an inch, or 0.100 in decimal form. Between those numbers are three lines that represent twenty-five thousandths of an inch, which is represented in decimal as 0.025. The regularly spaced lines represent one-thousandth of an inch, which is represented in decimal form as 0.001. The whole number scale depicted by the lines on the sleeve is a measurement of ten-thousandths of an inch, which is written as 0.0001 in decimal form.
- The sleeve is adorned with whole numbers: The number visible at the end is a thousandths representation. For instance, if the last number is 6, the final representation would be 0.500.
- Take note of the number of lines following the whole number: Take note of the markings next to the 100,000th mark and multiply by 0.25.
- Take note of the marking that corresponds to the thimble scale marking (closest to it and beneath the measurement line)
- The 3 counts from the previous process should be noted and added.
Screw Gauge Tool Formula

FAQs
Is the reading on the micrometre screw gauge accurate?
When a more precise measurement is required, a micrometre screw gauge should be used. This could measure objects as small as a few millimetres across and is usually accurate to 0.01 mm.
Why would the micrometre screw gauge have a ratchet?
In some kind of a nutshell, a ratchet acts as a limiting device by applying a force by sliding at a predetermined torque. It thus stops the spindle from moving any further. A few screw gauges, in addition to having scales that are locked in place, also have locking devices that prevent any type of error during the reading process.
Also Read:


